Understanding Your Dishwasher: Components & Safety First
Removing a dishwasher might seem daunting, but with the right preparation and knowledge, it’s a manageable DIY project. This guide will walk you through every critical step, ensuring both your safety and the integrity of your kitchen utilities. Whether you’re upgrading to a new model, performing a deep repair, or undertaking a full kitchen renovation, understanding the underlying principles of appliance removal is key. We’ll delve into ‘the why’ behind each action, from disconnecting power to handling plumbing, to empower you with confidence.
The ‘Why’ Behind Dishwasher Removal
People typically remove dishwashers for several reasons. The most common is to replace an old, inefficient, or broken unit with a newer, more energy-efficient model. Another significant reason is kitchen renovation, where the layout might change, or new cabinetry requires the appliance to be temporarily or permanently moved. Sometimes, a major repair might necessitate pulling the dishwasher out for better access to internal components or plumbing connections. Understanding your specific reason will help you plan for the subsequent steps, such as capping off lines or preparing for a new installation.
Essential Safety Precautions & PPE
Safety is paramount when working with any appliance connected to both electricity and water. Ignoring safety protocols can lead to serious injury or damage to your home. Always prioritize personal protective equipment (PPE) and ensure all utilities are properly disconnected before proceeding. This includes wearing sturdy work gloves to protect your hands from sharp edges or tools, safety glasses to shield your eyes from debris, and using insulated tools where appropriate. Never rush the process, and always double-check your disconnections.
Tools and Materials Checklist
Having the right tools on hand will make the removal process smoother and safer. Before you begin, gather all necessary items to avoid interruptions. This checklist covers the basics, but specific models might require additional specialized tools.
| Tool/Material | Purpose |
|---|---|
| Adjustable Wrench | Disconnecting water lines and fittings. |
| Pliers | Gripping, twisting, and securing hoses/clamps. |
| Screwdriver Set (Phillips & Flathead) | Removing mounting brackets and access panels. |
| Voltage Tester/Multimeter | Verifying power disconnection (crucial for safety). |
| Work Gloves | Protecting hands from sharp edges and debris. |
| Safety Glasses | Eye protection. |
| Bucket/Towels | Catching residual water from hoses. |
| Utility Knife | Cutting old sealant or drain hoses if necessary. |
| Flashlight/Headlamp | Illuminating dark spaces under the sink or cabinet. |
| Pipe Caps/Plugs | Capping off water supply and drain lines post-removal. |

Step-by-Step Guide: Disconnecting Utilities
Before you can even think about pulling the dishwasher out, you must safely disconnect all its vital connections: electricity, water, and drainage. This is arguably the most critical phase of the removal process, as improper disconnection can lead to electrical shock, water damage, or gas leaks (if applicable for certain models, though rare for dishwashers). Always approach this stage with caution and methodical precision.
Shutting Off Power: The Electrical Disconnect
The first and most crucial step is to cut off the electrical supply to the dishwasher. Failure to do so can result in severe electrical shock. Locate your home’s main electrical panel (breaker box) and identify the circuit breaker that controls the kitchen or specifically the dishwasher. It’s often labeled. Flip the breaker to the “OFF” position. To be absolutely certain, use a non-contact voltage tester or a multimeter to verify that no power is flowing to the dishwasher’s electrical box, typically found at the front bottom of the unit behind a kickplate. Once confirmed, you can safely proceed to open the junction box, usually secured by a screw, and disconnect the wire nuts, separating the dishwasher’s wires from the household wiring. Always cap the exposed household wires with new wire nuts for safety.
Turning Off Water: The Plumbing Disconnect
Next, you’ll need to shut off the water supply to the dishwasher. This prevents flooding once the supply line is detached. Most dishwashers have a dedicated shut-off valve, often located under the kitchen sink, connected to the hot water supply line. Turn this valve clockwise until it’s completely closed. If there isn’t a dedicated valve, you’ll need to shut off the main hot water supply to your entire house. Once the water is off, place a bucket and towels underneath the dishwasher’s water inlet valve (usually at the front bottom) to catch any residual water. Use an adjustable wrench to carefully loosen and disconnect the water supply line from the dishwasher. Expect a small amount of water to leak out.
Detaching the Drain Line: Preventing Backflow
The dishwasher’s drain line typically connects to the garbage disposal unit or a dedicated drain air gap on the sink. This line removes wastewater from the dishwasher. Locate the drain hose, which is usually a ribbed plastic hose. If it connects to a garbage disposal, it will be secured with a hose clamp. Loosen the clamp with a screwdriver or pliers and gently pull the hose off the disposal’s inlet. If it connects to an air gap, disconnect it from there. Be prepared for a small amount of stagnant water to drain out of the hose, so have your bucket and towels ready. Ensure the drain line is completely free from any connections before attempting to move the appliance.

Physical Removal: Unmounting and Extraction
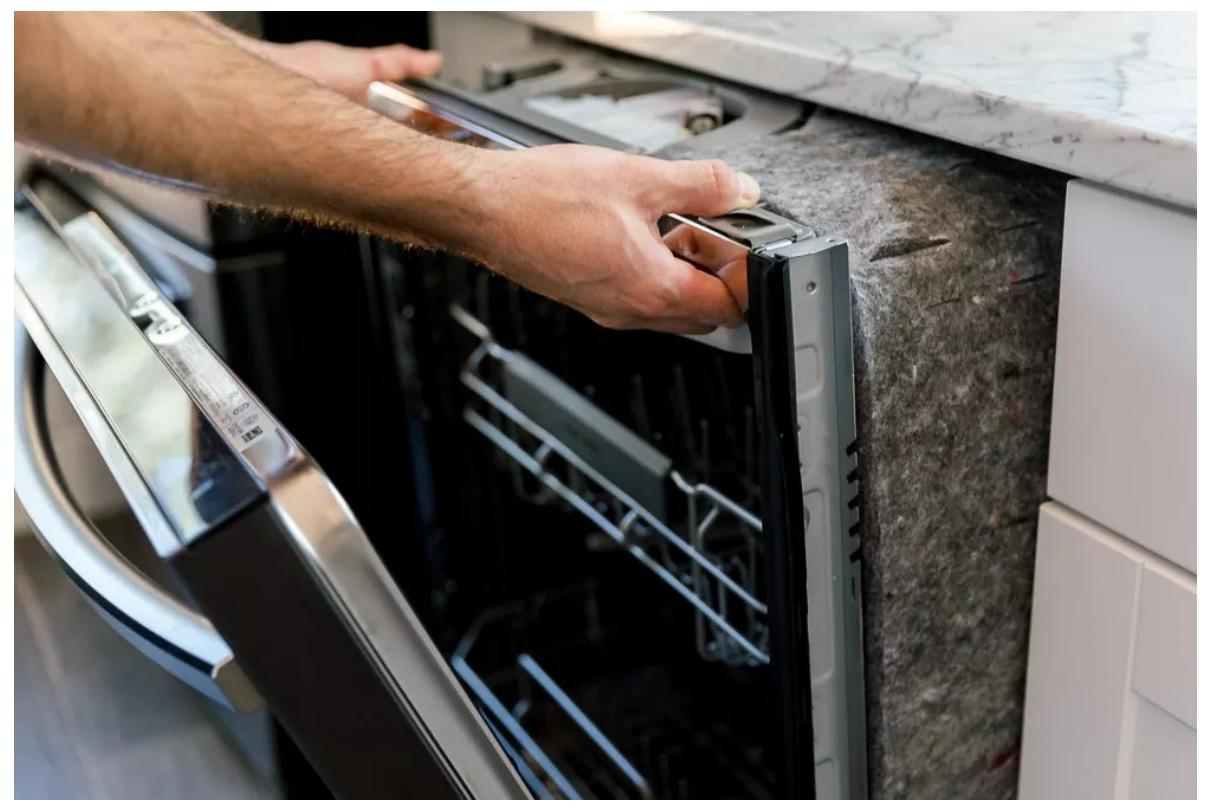
With all utilities safely disconnected, the next phase involves physically unmounting the dishwasher and carefully extracting it from its cabinet space. This step requires a bit of finesse and often a second pair of hands, especially if the unit is heavy or stuck. The goal is to remove it without damaging your kitchen floor, cabinets, or the dishwasher itself if you plan to reuse or sell it.
Releasing Mounting Brackets and Securing the Unit
Dishwashers are typically secured to the underside of the countertop or to the side cabinets using mounting brackets. These brackets prevent the dishwasher from tipping forward when the door is opened and loaded. To access them, you’ll usually need to open the dishwasher door and look up at the top edge of the frame, or on the sides, depending on the model. Use a screwdriver to remove the screws holding these brackets in place. Once the screws are out, the dishwasher is no longer physically attached to the cabinetry. Before attempting to slide it out, ensure that the adjustable leveling legs, located at the bottom front of the unit, are lowered slightly to create clearance and prevent the top of the dishwasher from scraping the countertop or floor.
Carefully Sliding Out the Dishwasher
Once the mounting brackets are released and the leveling legs are adjusted, gently pull the dishwasher straight out from its opening. It’s crucial to pull it slowly and evenly to avoid damaging the floor or the cabinet sides. If the unit feels stuck, do not force it. Check for any forgotten connections, loose screws, or obstructions. Sometimes, the wheels or feet might get caught on the flooring. If you have delicate flooring, consider laying down a moving blanket or a piece of cardboard to protect it from scratches. As you pull it out, be mindful of the remaining hoses and electrical conduit, ensuring they don’t snag or get damaged. If you’re working alone, use a hand truck or appliance dolly for easier and safer transport once the unit is fully out of the cabinet.
Dealing with Stubborn or Stuck Units
Occasionally, a dishwasher may seem impossible to budge. This can be due to accumulated grime, old sealant, or tight clearances. If your dishwasher is stuck, first re-verify that all mounting brackets are removed and all leveling legs are sufficiently lowered. Check for any hidden screws or clips. Sometimes, a buildup of floor wax or adhesive around the base can create resistance. A utility knife can be used carefully to score any old caulk or sealant around the edges. For particularly stubborn units, a gentle rocking motion from side to side might help break it free. If it still won’t move, check the floor for any raised edges or the cabinet opening for warped wood. As a last resort, if you suspect a hidden problem or if the unit is extremely heavy, consider seeking professional assistance to avoid injury or damage.
Post-Removal Procedures & Disposal
Once the dishwasher is successfully removed from its space, there are a few important steps to take to secure your utilities, clean the area, and responsibly dispose of the old appliance. Neglecting these final steps can lead to future issues or environmental concerns.
Capping Off Lines and Cleaning the Space
After the dishwasher is out, you’ll be left with exposed electrical wires, a hot water supply line, and a drain connection. It’s imperative to secure these. For the electrical wires, ensure they are capped with wire nuts and taped securely within the junction box or wall plate. For the hot water supply, install a pipe cap or plug onto the shut-off valve to prevent any accidental leaks. The drain line, if left open, could emit odors or become a pest entry point; it’s best to cap it off or ensure it’s properly sealed if you’re not immediately installing a new appliance. Take this opportunity to thoroughly clean the area where the dishwasher sat. Years of spills, food debris, and moisture can accumulate, making it a prime spot for mold or pests. Use an appropriate cleaner and disinfectant.
Responsible Disposal of Your Old Appliance
Dishwashers are large appliances and cannot simply be put out with regular trash. They contain metals, plastics, and sometimes refrigerants (though less common in modern dishwashers, older units might have them) that need to be disposed of properly. Check with your local waste management services or municipal recycling centers for appliance disposal guidelines. Many areas offer bulky item pickup services, or you might need to transport it to a designated recycling facility. Some appliance retailers offer removal of your old unit when they deliver and install a new one, so inquire about this service if you’re replacing it. Recycling ensures that valuable materials are reclaimed and hazardous components are handled safely, minimizing environmental impact.
Pro Tips for a Smooth Dishwasher Removal
Beyond the standard steps, a few expert insights can make your dishwasher removal project significantly easier and prevent common headaches. These tips draw from years of experience in appliance handling and home renovation.
Troubleshooting Common Removal Challenges
- Water Leaks: Even after shutting off the water, a small amount of residual water is normal. However, if you experience significant leakage, double-check that the shut-off valve is fully closed. Keep plenty of towels on hand.
- Stuck Drain Hoses: Old drain hoses can become brittle or fused to the garbage disposal nipple. If it’s difficult to remove, try applying a little heat with a hairdryer to soften the plastic, or carefully cut it with a utility knife if replacement is planned.
- Tight Spaces: If your dishwasher is a very tight fit, try removing the wheels or feet if possible, or gently tilting the unit while pulling. A thin piece of plywood or cardboard under the front feet can help it slide more easily.
- Electrical Box Access: Some dishwasher models have hard-to-reach electrical junction boxes. A flexible flashlight or a mirror can help you see and access the wiring more easily.
When to Call a Professional
While dishwasher removal is often a DIY-friendly task, there are circumstances where calling a professional is the wisest decision:
- Gas Connections: If your dishwasher is somehow connected to a gas line (very rare, but possible in older or commercial setups), absolutely call a licensed plumber or gas technician.
- Electrical Concerns: If you are uncomfortable working with electrical wiring, cannot locate the circuit breaker, or encounter unusual wiring, hire a qualified electrician.
- Major Leaks: If shutting off the main water supply doesn’t stop a significant leak, or if you suspect a burst pipe, contact a plumber immediately.
- Integrated Units: Some high-end custom kitchens feature fully integrated dishwashers that are part of the cabinetry facade. These might require specialized knowledge to remove without damaging custom panels.
- Physical Limitations: If the dishwasher is extremely heavy and you lack the physical strength or assistance to move it safely, or if you have a bad back, don’t risk injury. Professional movers or appliance installers have the right equipment.
Frequently Asked Questions (FAQ)
- Can I remove a dishwasher myself, or do I need a professional?
- Most standard dishwasher removals are DIY-friendly for individuals with basic handyman skills and a good understanding of safety protocols. However, if you’re uncomfortable with electrical or plumbing work, or if the unit is unusually integrated or heavy, hiring a professional is recommended to prevent injury or damage.
- What tools are absolutely essential for dishwasher removal?
- You’ll definitely need an adjustable wrench for water lines, a screwdriver set (Phillips and flathead) for mounting brackets and access panels, and a voltage tester for verifying power disconnection. A bucket and towels are also crucial for managing residual water.
- How do I handle water leaks during the removal process?
- Minor drips are common when disconnecting water lines. Have a bucket and plenty of towels ready. If you encounter a significant leak, immediately re-check that the water shut-off valve is fully closed. If the leak persists, you may need to shut off the main water supply to your house until the issue is resolved.
- What should I do with the old dishwasher after removal?
- Old dishwashers should be disposed of responsibly. Contact your local waste management or recycling center for guidance. Many municipalities offer bulky item pickup, or you might need to take it to a designated appliance recycling facility. Some new appliance retailers will also haul away your old unit.
- How do I ensure the electrical connection is safe?
- Always start by turning off the correct circuit breaker at your home’s main electrical panel. Verify the power is off using a voltage tester before touching any wires. Once the dishwasher’s wires are disconnected, cap the exposed household wires with new wire nuts and secure them inside the junction box or wall plate to prevent accidental contact.
